Here is a tip I found on Olaf Corten's web site.
I really like the equation information, so I have reproduced it here with some additional insights. Incidentally,
Olaf has a nice assortment of Pro/E tips. Check them out at: http://utopia.knoware.nl/~ocorten/tips.htm
View Orientation & Default Views
There are a few different ways to orient a view. The first, perhaps most obvious,
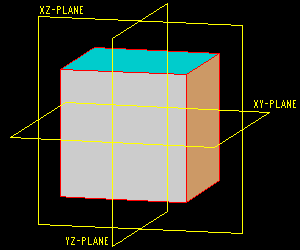
is using of datum planes and FRONT, RIGHT, TOP, etc... Just like orienting a view for sketcher.
Another way is dynamic orientation using VIEW > SPIN/PAN/ZOOM (in v.20) or
VIEW > ORIENTATION > ANGLES (in previous versions). With dynamic orientation, you
can rotate the part with respect to the screen (or spin center in v.20) about the Horizontal (H),
Vertical (V), and Normal (C) axes of the screen. In other words,
the view is oriented with respect to the screen (or spin center), not to geometry on the part.
With dynamic orientation the order of the movement is important.
If you rotate NORMAL 30 degrees then VERTICAL 30 degrees,
the result will be quite different than rotating VERTICAL 30 degrees then
NORMAL 30 degrees. In version 20 the icons in the ORIENTATION dialog
box make this much clearer. Play with it a little to see the results.
To set a view orientation as DEFAULT, you can use the ENVIRONMENT settings, OR set
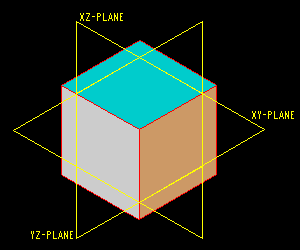
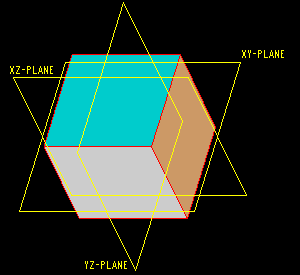
the default in your config.pro. Pro/E has 3 selectable settings for the default view:
ISOMETRIC, TRIMETRIC, and USER_DEFINED. Isometric and trimetric
are pre-defined orientations shown below: (The equations are from Olaf.) |
To use one of these, or to make your own default view, include
the following lines in your config.pro:
ORIENTATION USER_DEFAULT
Y_ANGLE -40 (This defines the
VERTICAL indicated above.)
X_ANGLE 30 (This defines
the HORIZONTAL indicated above.)
NOTE: The order of X_ANGLE and
Y_ANGLE in the config.pro is important. Notice that the TRIMETRIC
view above requires the X_ANGLE (Horizontal) first.
ALSO NOTE: If the X_ANGLE and
Y_ANGLE lines appear without the ORIENTATION
line, Pro/E will assume it is the default view you desire.
If you wish to have access to more than one of these views in a part, build a mapkey
to orient the part as desired and save the view using SAVED VIEWS. This can be a
real time saver especially if you wish to use one of the views on a drawing.
I hope you enjoyed this information. Once again I'd like to thank
Olaf Corten for some of the above information. |