|
Visibility States
 |
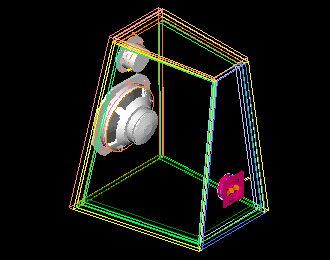
Figure 1 shows an assembly with some of the components shaded, some
in wireframe, and some in no hidden line display mode. |
How do you do that?
Answer: Set different visibility states for separate components.
In assembly mode, choose VIEW / MODEL SETUP / COMPONENT DISPLAY... this
will activate a second Menu Manager on the right side of your screen. Choose
CREATE and give your new scheme a name. The default of VIS0001 is good
for starters. Next the EDIT DISPLAY menu will appear. Use the selection
items WIREFRAME, HIDDEN LINE, SHADED, etc. to select the desired state of
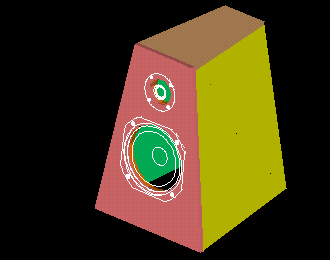
the components. For the speaker of Figure 2, the main Pro/E display setting
was wireframe, so SHADING was selected from the menu, then the 2 speaker
drivers and the terminal block were selected to have their state changed.
The opposite can also be done and saved in the same model. Just define
a second visibility state, and define the components differently.
It is also easy to redefine an existing visibility state. Just select REDEFINE
and the definition you wish to change. Use the UNDO menu option then pick a part to
remove a components visibility definition.
Another trick is to BLANK a component. This is similar to putting the
component on a layer and turning the layer off, and similar to creating
a simplified rep without the part, except that it is tricky to bring it
back. My suggestion - don't use blank.
To see how things are progressing, use the UPDATE SCREEN menu option,
before completing the definition.
Have fun dazzling your boss with the new images you can create!
|