|
|
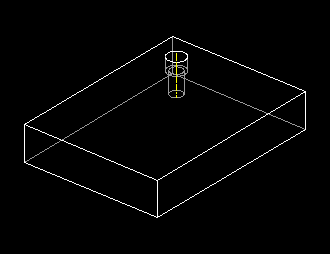
What's a UDF? It stands for User Defined Feature. In other words it's a feature that you describe to Pro/E -- a feature that Pro/E doesn't already have. When you create a round, you are creating a feature that Pro/E has already defined. So, to create a counter sunk bolt hole, you simply use FEATURE / CREATE / BOLT_HOLE. Oops? The BOLT_HOLE option isn't there! OK, we'll make one. We do this with a User Defined Feature, or UDF. First we create a simple block with the features of the "BOLT_HOLE." When creating these features, be very careful of the references you use. These references will be required later in the definition of the "BOLT_HOLE" feature, and again each time you place your new User Defined Feature. In the case of Figure 1, a hole was created using STRAIGHT and LINEAR options. The top surface of the block was chosen as the placement plane, then 2 sides of the block as dimensioning references. These references were chosen because of the way the new "BOLT_HOLE" feature is intended to be used. Finally, the THRU NEXT option was used to define feature depth. TIP: Be careful in the way you define the feature. In this example, THRU ALL would produce the same result in this block, but THRU ALL may yield an undesired result in other places this feature will be used.
Next another hole was created using the COAXIAL option. The axis of the first hole was chosen for position, then the same top surface as the placement plane, with a BLIND depth. TIP: Use references that will be local to the final UDF. In this case the axis of the first hole will be included in the UDF, so the reference will always be there for the second hole. TIP: When you can't use local references, re-use reference that were used to create earlier features of the UDF. This will reduce the parent-child relationships in future models, and hence yield a more robust UDF. Now we have a simple recessed bolt hole. (See Figure 1.) This will become our "BOLT_HOLE" feature. To use this again and again without having to re-create the holes, make it into a UDF. To do this use FEATURE / UDF LIBRARY / CREATE / (give a name). At this point you'll have to decide whether to save the reference part (the one on your screen) with the UDF definition, or not. TIP: For UDF's you will use again and again, create a simple model like this one to define the UDF and save it with the UDF. This will make it easy to go back and figure out how you defined the features when you can't remember exactly what your prompts mean. Next you select the features to include in the UDF definition. In this case the two holes. From here you specify the prompts that will appear each time this feature is used. These will appear just as the prompts Pro/E gives during any other feature creation. TIP: Give some thought to the prompts you use. They will appear again. With a UDF you can be as extravagant as you wish. There is a lot of functionality here, so consult HELP for more information on all the different options.
Once you’ve created it, how do you use it? Choose FEATURE / CREATE / USER DEFINED to select then create a new feature that you have previously defined as a UDF. In Figure 2, the UDF created above has been placed in a new block. Figure 3 shows the UDF patterned. TIP: Use FEATURE / GROUP menu options for manipulation like patterning of UDF's.
The real power of UDF's is using them frequently whenever you repeat something a lot. An example is shown in Figure 4, where a second UDF, a "THREADED BOLT HOLE", is added to another block. The threaded UDF includes the drill hole, drill point, chamfer, and cosmetic thread (which includes all the thread parameters.) In the assembly the threaded hole is placed with reference to the axis of the first UDF bolt hole in the first block, then patterned by reference. To do this, the first feature of the threaded hole was placed by referencing an axis so that it is easy to have the threaded hole follow the counter sunk hole in the assembly.
UDF's are a powerful tool, but they can be a little complicated at times. Don't be scared off by the big name or by all the options. Experiment a little, they can really save a lot of time, and make your designs more consistent. |
 |
 |
 |
 |
 |
 |